
<script> import ImageGallery from '$lib/components/ImageGallery.svelte'; </script>
The holy grail of AI storytelling isn't just generating a beautiful character-it's generating the same beautiful character, over and over again, in different situations.
The process that works most reliably is boring in the best way. Build a multi-view reference grid before scene generation. Pick one canonical identity frame and hold it constant. Lock hairstyle, age cues, facial proportions, and signature wardrobe tokens. Then vary only one axis at a time: pose, lighting, environment, or expression. Model quality improved in 2026, but recurring identity still drifts quickly without explicit constraints.
If you've spent any time with generative AI tools like Midjourney or Stable Diffusion, you've likely encountered the "shifting identity" problem. You generate a stunning character for your protagonist, but in the next prompt, they look like a completely different person who happens to share the same hair color.
Maintaining character persistence-keeping facial features, body type, and costume details consistent across a series-is still one of the hardest problems in AI image workflows. Tools like LoRA (Low-Rank Adaptation) and IP-Adapter help a lot, but a simpler technique remains foundational: the Grid Method.
If these tools are new to you:
- LoRA is a lightweight way to tune a model toward a style or identity.
- IP-Adapter lets you inject image reference information during generation.
- ControlNet adds structural constraints (pose, edges, depth) so scenes remain coherent.
What is the Grid Method?
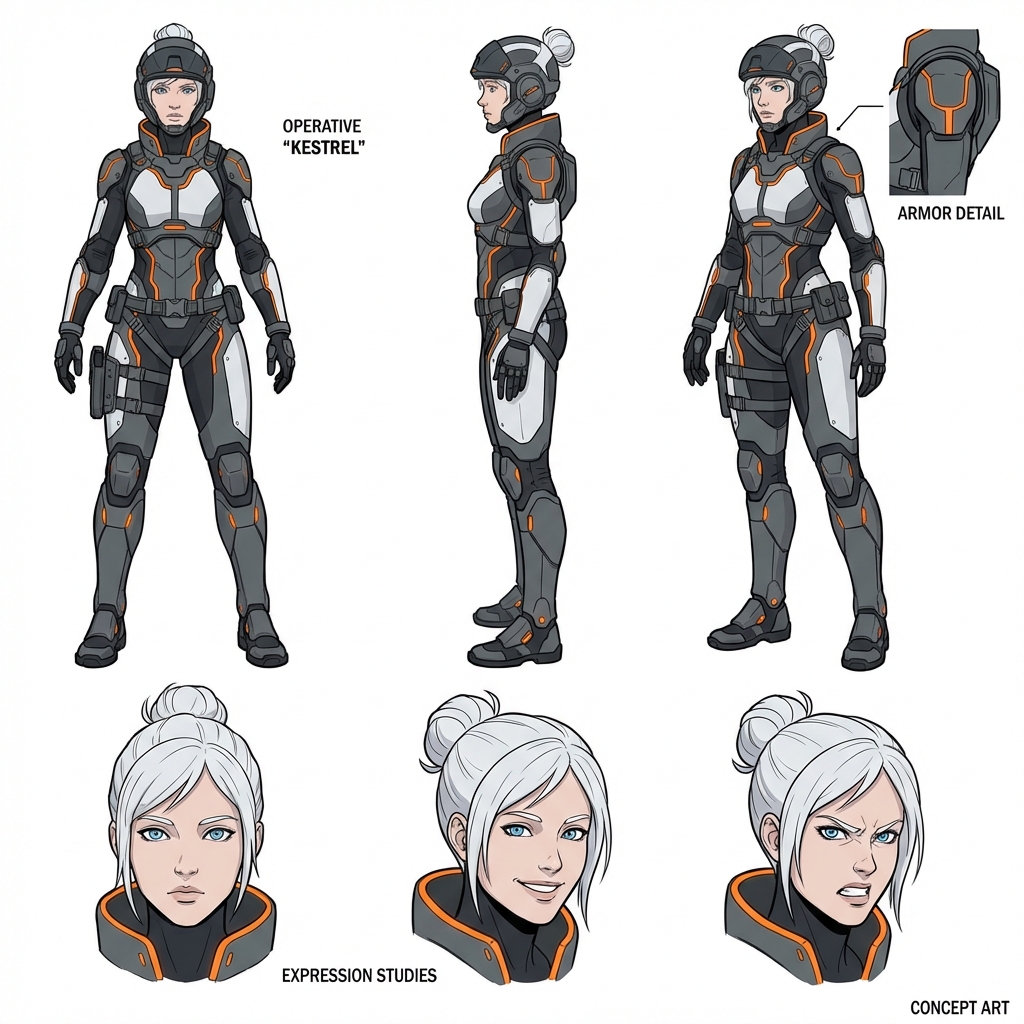
The Grid Method involves treating your character generation like a concept artist's reference sheet. Instead of asking the AI to generate a single portrait, you ask it to generate a "character sheet" or "reference grid" showing the same subject from multiple angles and with different expressions in a single image.
Because the AI generates all these views simultaneously in one context window, it naturally enforces consistency between the faces. The model "knows" that the face in the top left must match the face in the bottom right because they are part of the same semantic object: a character sheet.
!Character Grid Example An example of a character reference grid generated in a single pass. Note the consistency in facial structure and costume details across different angles.
Step 1: Generating Your Reference Grid
The first step is to craft a prompt that forces the model to create a multi-view layout. You want to use keywords that trigger "concept art" and "character design" associations in the model's latent space.
Key Prompt Elements:
character sheetreference sheetgrid layoutmultiple viewsfront view, side view, back viewexpression sheetneutral, happy, angry expressionswhite backgroundorsimple background(to keep focus on the character)
Example Prompt:
A professional character design sheet for a futuristic female operative. High-tech clothing with orange accents, white hair, blue eyes. The layout is a 2x3 grid. Top row: Full body front view, side profile view, 3/4 turn view. Bottom row: Close-up of face - neutral expression, smiling, angry. Clean lines, flat shading, white background. Concept art style. --ar 3:2
Step 2: Utilizing the Grid
Once you have a grid you like, that image becomes your identity source. Use it as "ground truth" and branch from it.
Method A: Midjourney Image Prompt + Omni Reference
In Midjourney, image prompting gives overall visual guidance, and Omni Reference lets you preserve specific subject identity more directly.
Use the grid as reference, then push scene instructions in text:
[Image URL] cinematic shot of the character running through a neon city, raining, dynamic action pose --iw 2
If identity drifts, increase reference influence and simplify competing style directives.
Method B: ControlNet + IP-Adapter (Stable Diffusion Ecosystem)
For more advanced users, this is where the magic happens. You can crop the best face from your grid and use it with IP-Adapter (FaceID) to transfer the facial features to a new generation.
Because the grid gave you a clean, neutral-lighting view of the face (usually in the "front view" or "headshot" section), it acts as a perfect source image for face-swapping or feature-injection models.
For implementation details, the Diffusers ControlNet docs and Diffusers IP-Adapter docs are the most practical starting point.
Method C: ChatGPT Image Workflows (GPT Image Models)
ChatGPT now supports a more iterative image workflow than early one-shot prompting approaches. Use conversational edits with the same reference image chain, using OpenAI's image generation guide as the API reference:
- Generate or upload your character grid first.
- Ask for scene changes while explicitly preserving identity: facial geometry, hairline, eye spacing, jawline, and key costume motifs.
- Edit in controlled increments: environment first, then pose, then clothing details.
- Reuse the best output as the next input when identity starts drifting.
Method D: Gemini Image Models (Including "Nano Banana" Family Naming)
Google's image-capable Gemini models now expose strong in-context multimodal editing flows. That makes them useful for "keep this character, change scene X" workflows (see Gemini image docs):
- In-context identity carryover: Feed your grid and request new compositions.
- Localized edits: Keep facial structure while changing outfit, camera angle, or environment.
- Fast iteration loops: Generate -> critique -> edit in short conversational cycles.
No model gives perfect persistence every time. The winning move is still a reference-first pipeline plus constrained edits.
Why This Works Better Than Single Images
When you generate a single portrait, the AI utilizes all its parameters to make that one specific angle look good, often "hallucinating" details that work for that angle but are hard to replicate.
When you force a Grid generation:
- Simultaneous Coherence: The model must solve for the 3D structure of the face to draw the profile and front view next to each other convincingly.
- Neutral Lighting: Character sheets typically default to flat, even lighting. This allows you to re-light the character easily in subsequent generations without fighting against baked-in dramatic shadows.
- Asset Library: You instantly get a costume reference (back/side views) that you might not get in a dramatic portrait.
The Identity Lock Checklist
Before moving into story scenes, lock these attributes in writing:
- head shape (round, oval, angular)
- eye spacing and eyelid shape
- nose bridge and tip profile
- lip line and mouth width
- hairline, part direction, and strand texture
- one signature accessory or garment motif
If these are vague, character drift is guaranteed.
Simple Prompt Template For Non-Experts
If you want a copy-and-adapt format:
[reference image], same character as reference, preserve face geometry and hairstyle, [new scene], [new action], [camera angle], [lighting], keep costume motif [X], keep facial proportions unchanged
Example:
[reference image], same character as reference, preserve face geometry and hairstyle, rainy train platform at night, looking over shoulder while holding umbrella, medium shot eye-level, mixed neon and practical station lighting, keep orange collar detail, keep facial proportions unchanged
This works because it separates immutable identity traits from editable scene variables.
The Result
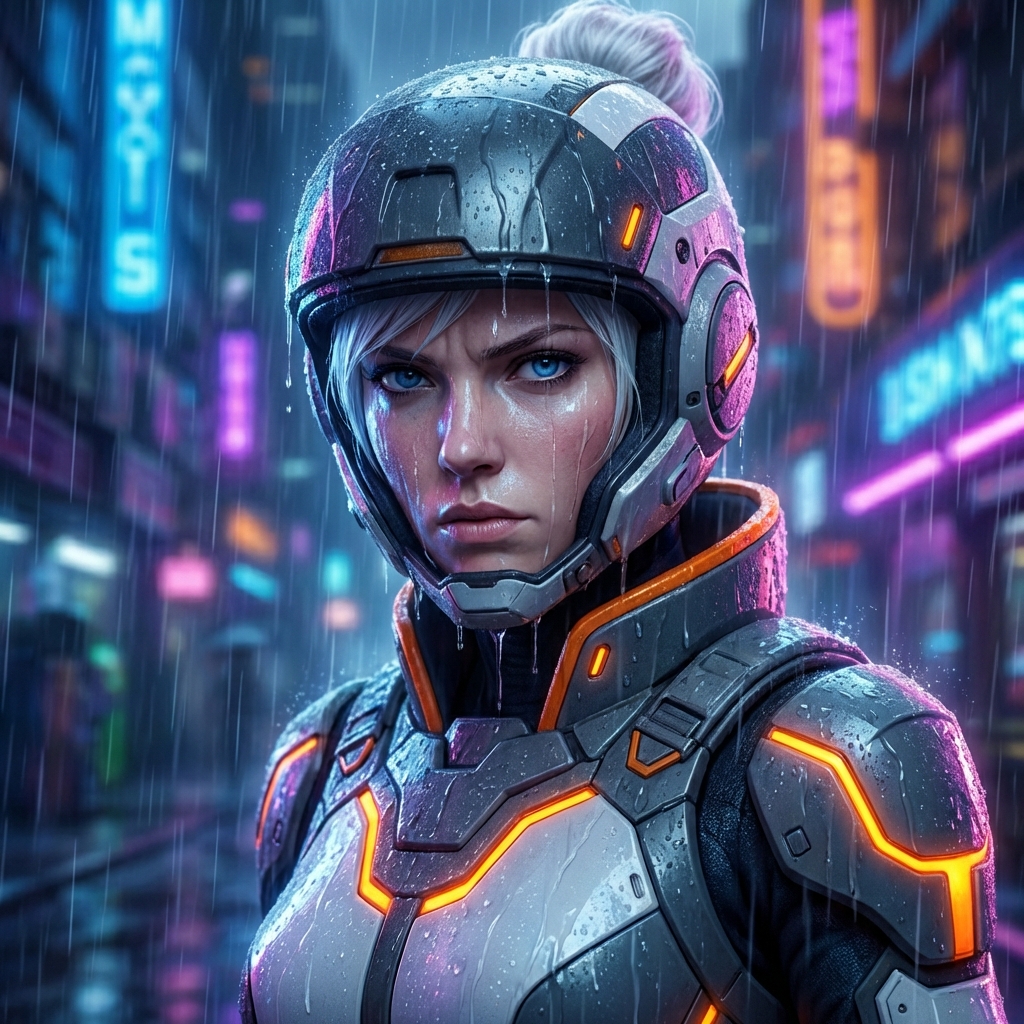
By starting with a solid reference grid, you anchor your character's identity. You can then take that identity and place it into complex, dramatic scenes while retaining the core features that make them recognizable.
!Final consistent character The final result: The same character from the grid, now rendered in a coherent, dramatic scene.
Gallery of Results
Once you have your grid and strategy locked in, you can place your character in any scenario. Here are a few examples generated using this workflow across different environments.
<ImageGallery images={[ { src: '/images/blog/character-consistency-casual.webp', alt: 'Casual setting', caption: 'Casual Setting: Cafe' }, { src: '/images/blog/character-consistency-formal.webp', alt: 'Formal event', caption: 'Formal Event: High-Tech Gala' }, { src: '/images/blog/character-consistency-action.webp', alt: 'Action sequence', caption: 'Action Sequence: Rooftop Combat' } ]} columns={3} gap="1rem" />
Tips for Success
Use the following tips to keep execution clean and repeatable:
- Keep it Simple: Don't over-complicate the grid prompt. Focus on the physical description of the character.
- Consistent Seeds: If you find a grid layout you like but want to tweak the character, keep the seed constant and only change the character description.
- High Resolution: Generate your grid at the highest possible resolution. You will likely want to crop into it later.
- One Variable Per Iteration: Change pose or lighting or styling in each pass, not all three.
- Save a Canonical Frame: Keep one "identity master" image untouched and always branch from it.
The Grid Method is not just a trick. It is a workflow shift: Concept -> Reference -> Constrained Variations -> Final Scene.
That shift is what turns random image generation into repeatable visual storytelling.